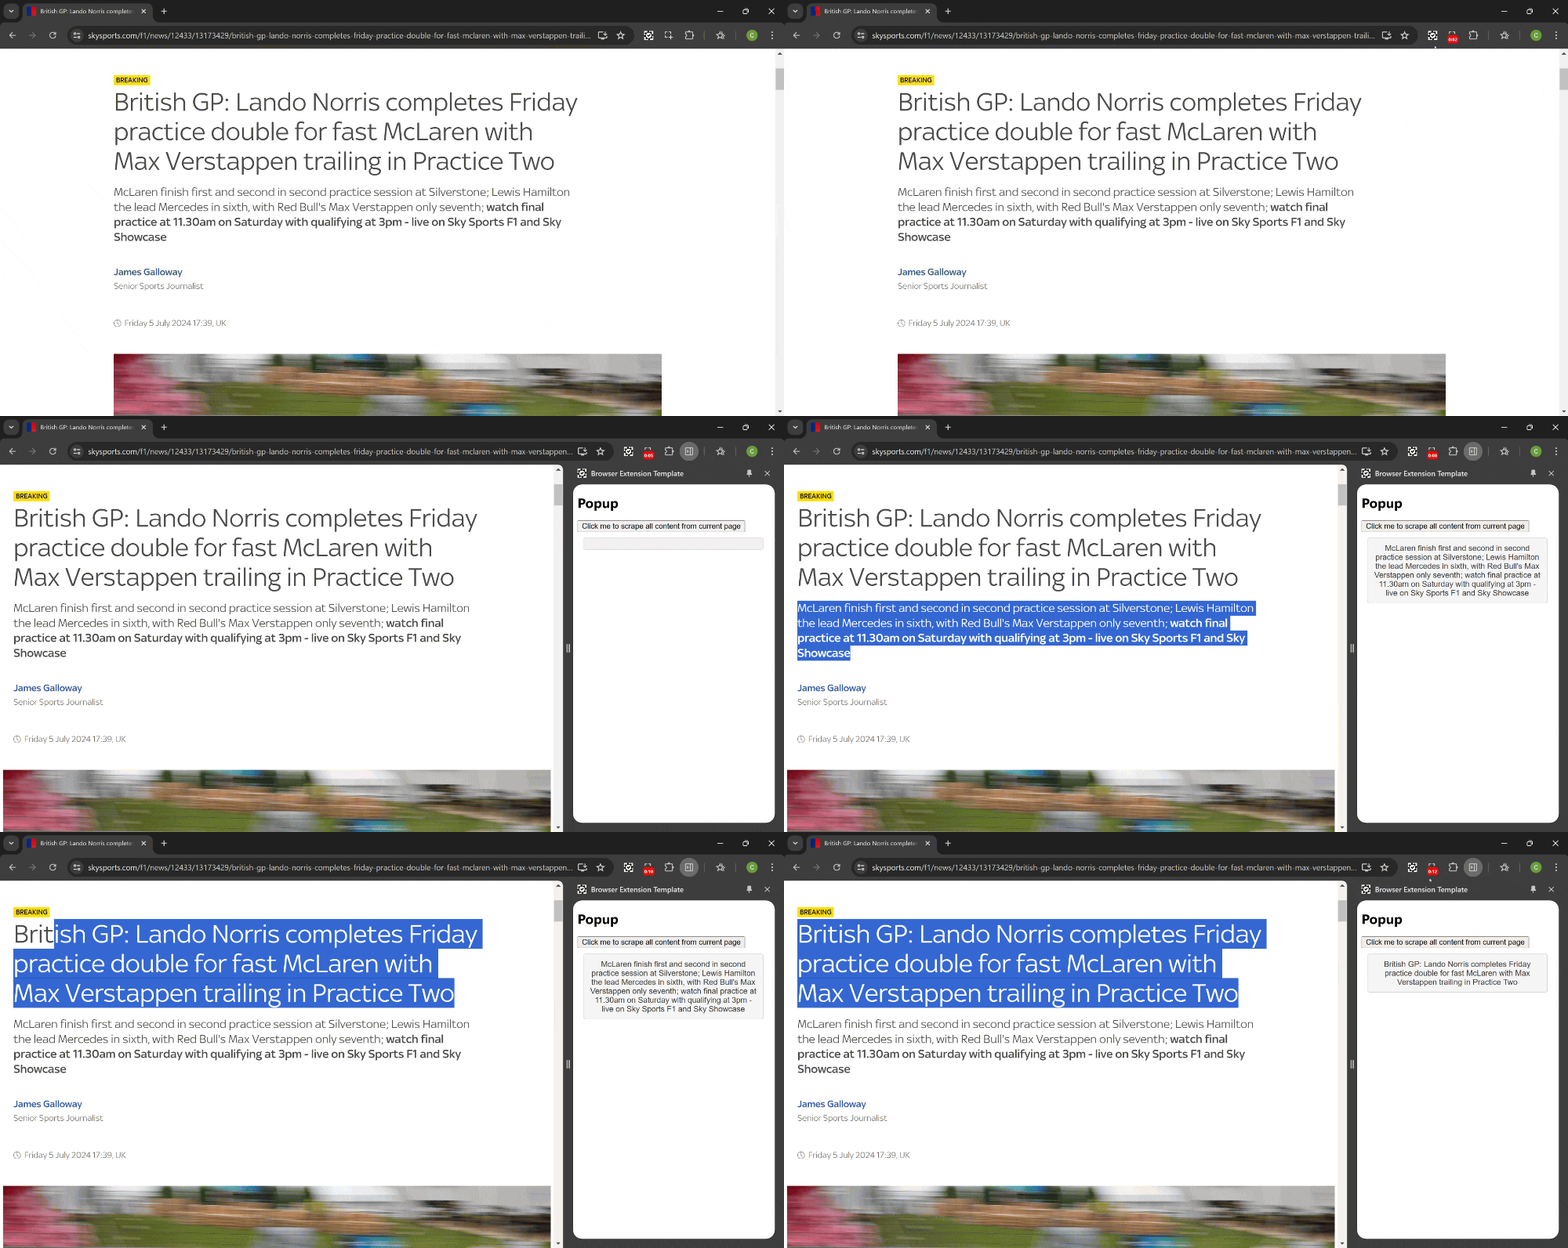
This week, I’ve had the pleasure of diving into browser extensions, particularly focusing on creating a tool to help users identify potential bias on any webpage.
See the “finished” extension here (feel free to install and give it a like): https://chromewebstore.google.com/search/diversetalent
The process has been mostly straightforward, so I wanted to share a quick guide on how to get started with your first browser extension.
TLDR; here is a repo with a simple example of a browser extension: Browser Extension Template
The How: Building Your First Extension
Getting Started
To kick things off, you can use a simple and easy-to-follow template available on GitHub: Browser Extension Template. This template includes the essential files needed for a basic extension which showcases how to communicate between the popup and the current webpage.

Key Files Explained
A browser extension generally contains the following key files:
- manifest.json – Tells the browser what files are included with your extension and what permissions your extension needs.
- popup.html – Optional. If you need to display a popup window when someone clicks your extension button in the toolbar.
- content.js – Optional. The js to be injected into the current browser page so that you can access the DOM.
- background.js – Optional. A place to add code that can respond to events, even when your popup is not showing.
The github repo contains more files than the ones listed above.
- manifest.json: This is the blueprint of your extension. It includes metadata such as the extension’s name, version, description, and the permissions it requires.
{
  "manifest_version": 3,
  "name": "Browser Extension Template",
  "version": "0.1.0",
  "description": "This is a template extension project for a browser extension.",
  "icons": {
    "16": "icon.png",
    "32": "icon.png",
    "48": "icon.png",
    "128": "icon.png"
  },
  "side_panel": {
    "default_path": "popup.html"
  },
  "permissions": ["activeTab", "sidePanel"],
  "action": {
    "default_title": "Browser Extension Template",
    "default_popup": "popup.html"
  },
  "background": {
    "service_worker": "background.js",
    "type": "module"
  },
  "web_accessible_resources": [
    {
      "matches": ["<all_urls>"],
      "resources": ["icon.png"]
    }
  ],
  "content_scripts": [
    {
      "all_frames": false,
      "matches": ["<all_urls>"],
      "js": ["content.js"],
      "css": ["popup.css"]
    }
  ]
}- popup.html: This is the HTML file for the popup interface that appears when the extension icon is clicked.
<!DOCTYPE html>
<html>
  <head>
    <meta charset="utf-8" />
    <meta http-equiv="X-UA-Compatible" content="IE=edge" />
    <title>Page Title</title>
    <meta name="viewport" content="width=device-width, initial-scale=1" />
    <link rel="stylesheet" type="text/css" media="screen" href="popup.css" />
    <script src="popup.js" type="module"></script>
  </head>
  <body style="min-height: 400px">
    <h1>Popup</h1>
    <button id="clickme">
      Click me to scrape all content from current page
    </button>
    <div class="response-text" id="response"></div>
  </body>
</html>
- popup.js: This JavaScript file handles the logic for the popup interface.
(async () => {
    console.log('popup.js loaded');

    const getTabSelectedText = async () => {
        console.log('Popup: getTabSelectedText clicked');
        // Send a message to the content script to get the selected text
        const tabs = await chrome.tabs.query({ active: true, currentWindow: true });
        if (tabs.length === 0) return; // Exit if no active tab found
        chrome.tabs.sendMessage(tabs[0].id, { type: 'GET_PAGE_CONTENT' }, (response) => {
            console.log('Popup: Received response:', response);
            const responseElement = document.getElementById('response');
            if (responseElement) responseElement.innerText = response?.content || 'No content';
        });
    };

    document.addEventListener('DOMContentLoaded', () => {
        // Add event listener for the getTabSelectedText button
        const clickMeButton = document.getElementById('clickme');
        if (clickMeButton) clickMeButton.addEventListener('click', getTabSelectedText);
    });

    chrome.runtime.onMessage.addListener((request, sender, sendResponse) => {
        if (request.type === "SELECTED_TEXT") {
            // The page html content
            const content = request.content;
            const responseElement = document.getElementById('response');
            if (responseElement) responseElement.innerText = content;
        }
        return true; // Indicate that sendResponse will be called asynchronously
    });
})();- content.js: This script runs in the context of the webpage and contains the logic for detecting bias.
  (async () => {
    "use strict";

    console.log('browser extension content.js loaded');

    const sendSelectedText = () => {
        const selectedText = window.getSelection()?.toString();
        if (selectedText) {
            console.log('SENDING SELECTED_TEXT message:', selectedText);
            chrome.runtime.sendMessage({ type: 'SELECTED_TEXT', content: selectedText }, (response) => {
                if (chrome.runtime.lastError) {
                    console.error('Error sending message:', chrome.runtime.lastError.message);
                }
            });
        }
    };

    document.addEventListener('mouseup', function (event) {
        console.log('mouseup event');
        sendSelectedText();
    });

    chrome.runtime.onMessage.addListener(
        function (request, sender, sendResponse) {
            if (request.type === "GET_PAGE_CONTENT") {
                // Extract the page's text content and the current selection
                const content = document.body.innerText;
                const selectedText = window.getSelection()?.toString() || '';
                sendResponse({ type: 'SEND_PAGE_CONTENT', content, selectedText });
            }
            return true; // Keep the message channel open for asynchronous response
        }
    );
})();- background.js: This script handles background tasks and manages the extension’s lifecycle.
   // Handles background tasks for the extension
(() => {
    console.log('background.js loaded');

    // Ensure the sidePanel API is available before attempting to use it
    if (chrome.sidePanel) {
        chrome.runtime.onInstalled.addListener(() => {
            // Automatically open the side panel when the extension's action is clicked
            chrome.sidePanel.setPanelBehavior({ openPanelOnActionClick: true });
        });
    } else {
        console.warn('This version of Chrome does not support sidePanel API.');
    }

    // Define a function to handle incoming messages
    const handleMessage = (request, sender, sendResponse) => {
        console.log('Message received:', request);
        switch (request.type) {
            case 'SELECTED_TEXT':
                // Process the selected text, e.g., save it or call an API
                console.log('Background: Selected text:', request.content);
                break;
            // Add more cases as needed
            default:
                console.warn('Unhandled message type:', request.type);
        }
        // Indicate that sendResponse will be called asynchronously
        return true;
    };

    // Listen for messages from content scripts or popup
    chrome.runtime.onMessage.addListener(handleMessage);
})();
Build & Debug
To run the code, just follow these steps.
- Open your browser and navigate to
chrome://extensions/. - Enable Developer Mode.
- Click on
Load unpackedand select the cloned repository of your extension. - To make changes, edit the relevant JS or HTML files, then refresh the extension and the webpage to see your updates in action.
- To see debug messages, open the Chrome dev tools for the target webpage, popup and/or service/worker.
Store Submission
- Update the
manifest.jsonfile with the appropriate details (name, version, description, etc.). - Zip the contents of your extension’s directory.
- Go to the Chrome Web Store Developer Dashboard.
- Click on
Add new item. - Upload the zip file.
- Add the necessary details and click on
Publish.
Conclusion
Creating a browser extension can be a fun and rewarding project, opening up numerous possibilities to enhance user interactions on the web. With this guide, you should have a solid foundation to build your own extensions and even publish them for others to use. Happy coding!

